
One of the best ways to elevate your charcuterie board is to get fancy with folding salami. In this article I share my top 5 favorite tricks for how to fold salami. I will show you how to make salami roses, bouquets and chains as well as some general recommendations for using salami on a charcuterie board.
You can also see more about my favorite meat to serve on a charcuterie board and my top tips on cutting charcuterie meat
Hi, I’m Gretchen - creator of Amazing Charcuterie Boards. I help home hosts and beginners create beautiful, stress-free charcuterie boards with simple rules, realistic portions, and easy styling techniques.

If you’re planning your next board, you may also find these helpful:
→ Charcuterie Board Portion Calculator
→ How to Design a Charcuterie Board (simple rules & layouts)
→ The Best Charcuterie Board Pairings

Want more board ideas and planning guides? Join my free newsletter here or search ideas.
Best Types of Salami for a Charcuterie Board
Here are some of the best salami options for a charcuterie board:
- Genoa Salami – A classic choice with a rich, tangy flavor and marbled texture.
- Soppressata – An Italian salami with a bold, slightly spicy taste and coarser texture.
- Pepperoni – A fan-favorite with a bold, zesty flavor and a slightly crispy edge when sliced thin.
- Finocchiona – A fragrant, fennel-infused salami with a mild, aromatic flavor.
- Chorizo – A Spanish-style salami with smoky, spicy flavors that add variety to any board.
Watch my video on how to fold Salami
5 Ways to Fold Salami for Charcuterie Boards
The techniques below all use slices pieces of salami. If you are slicing your own salami, it’s best to cut pieces into thin rounds, about 1/8 to 1/4-inch thick, depending on your preference. It’s best to use salami that is 2-3 inches in diameter for the best folding results.

Simple Salami Rose
This is one of my favorite ways to fold salami. It creates an open and simple charcuterie rose that is put directly on the charcuterie board.
This charcuterie rose is also easy to make and all you need is the salami and a container or champagne glass. Start by folding your salami over the top of the cup. Overlap your pieces and work your way around the cup. Flip your rose upside down onto the board and press down before removing the cup.
I love to make a few of these roses for my boards.
See a step by step guide to make this salami rose.

Folded and Loose Salami
This is less about a fancy folding technique and a simple strategy for laying salami out on the board.
Avoid taking your salami directly out of the wrapping and placing it on the board. Instead, pull the pieces apart. You can either lay your pieces directly on the board of fold each piece in half and lay them in a layered stack on the the board.

Salami Chain
Start the Chain: Take one slice of salami and fold it in half. Place it flat on the board, then take the next slice and gently fold it in the opposite direction to create a “link” shape, overlapping it slightly with the first slice.
Continue Looping: Repeat this process, alternating the fold direction and slightly overlapping each slice to create a chain-like effect. Keep the slices tightly aligned for a neat look.
Finish the Chain: Once you’ve achieved the desired length, you can either curve the chain into a circular shape on the board or let it stretch out as a straight line.
See more on making a salami river or chain.

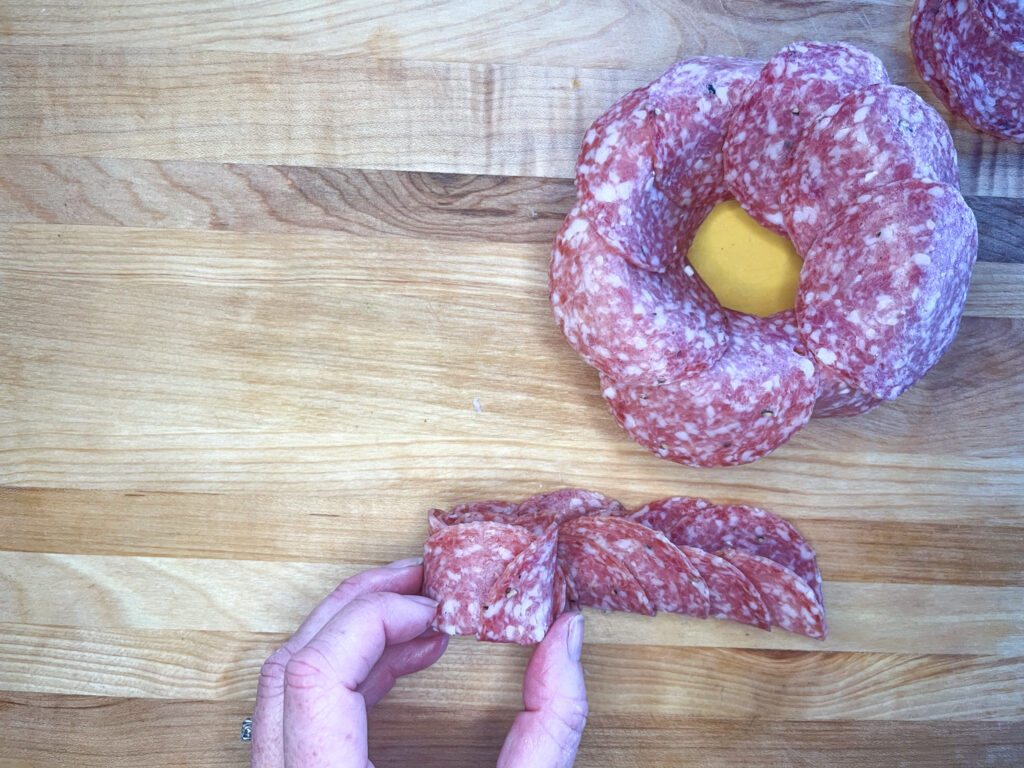
Fancy Salami Rose
The next technique for folding salami creates and impressive salami rose. The difference between this rose and the one above is that this rose sits inside a container. If you will be making a lot of charcuterie boards, you may want to invest in portion cups, although it’s possible to use small bowls that you have at home. The photo above is made is a ramekin.
Start by working your way around the bowl folding the salami around the lip of the bowl so that about 1/3 of the meat is over the lip of the container.
Next lay out 5-9 pieces of salami so they are just overlapping. Fold this in half and then roll it up. Place this in the center of the bowl and place on the charcuterie board.


Salami Bouquet
This isa fancy way to style salami. To fold salami into a salami bouquet you will need a small bowl.
Create the Petals: Take a slice of salami and fold it in half. Then, fold it in half again to form a small cone-like shape. You can adjust the folds to make the petals more or less open, depending on your preference. Repeat this process for multiple slices of salami to create several “petals.”
Assemble the Flowers: For each flower, start by arranging the petals in a circular pattern. Place one petal in the center, then add more petals around it, slightly overlapping them to create a fuller look.
Secure the Flower: Once you’ve arranged the petals, use a toothpick or small skewer to hold the flower together in the center, pinching the base of the petals to secure them. You can also stack these all into a small container to make a full bouquet like in the image above.