If you’ve scrolled through charcuterie content for more than five minutes, you’ve probably stopped at a board with a winding, flowing ribbon of salami snaking its way across the wood. That’s a salami river, and it’s one of the most eye-catching techniques in the charcuterie world. The good news? It looks far more complicated than it is. With the right salami, a little patience, and this step-by-step guide, you’ll have a stunning salami river on your next board.
Looking for more ways to style salami? You might like:
Hi, I’m Gretchen - creator of Amazing Charcuterie Boards. I help home hosts and beginners create beautiful, stress-free charcuterie boards with simple rules, realistic portions, and easy styling techniques.

If you’re planning your next board, you may also find these helpful:
→ Charcuterie Board Portion Calculator
→ How to Design a Charcuterie Board (simple rules & layouts)
→ The Best Charcuterie Board Pairings

Want more board ideas and planning guides? Join my free newsletter here or search ideas.
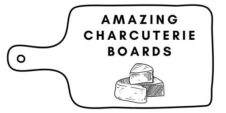
What Is a Salami River?
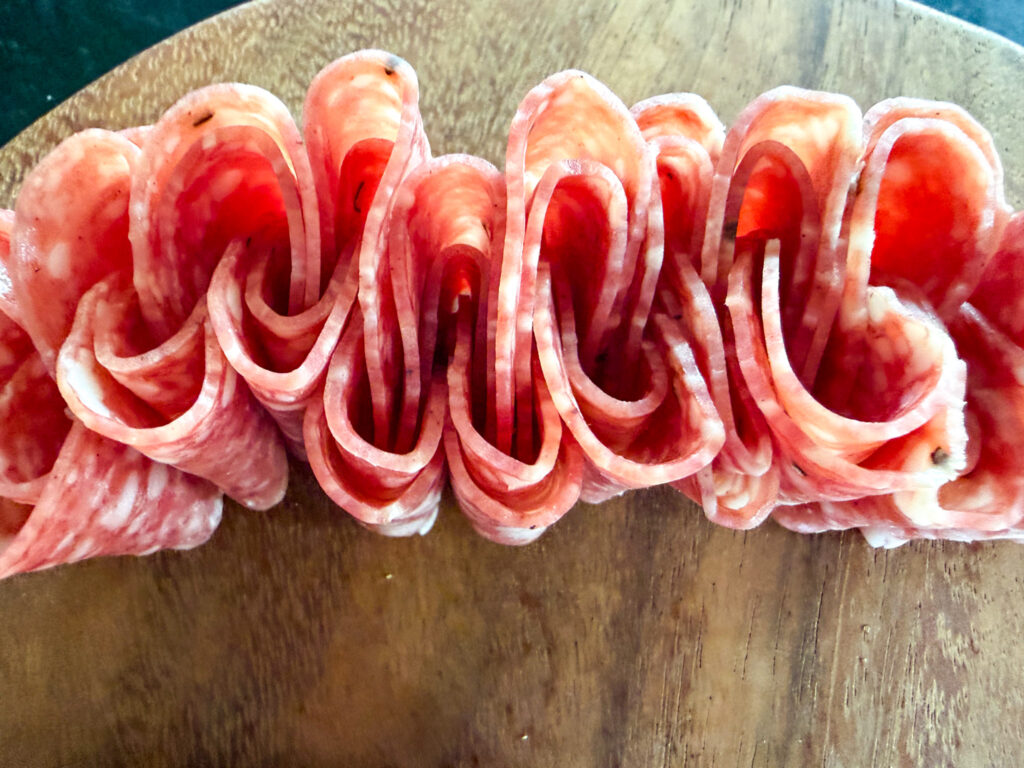
A salami river is exactly what it sounds like: salami slices folded and layered in a continuous, flowing line across your board, mimicking the winding shape of a river or ribbon. The folds create dimension and movement, making the board feel dynamic and abundant rather than flat. It’s a technique that works on boards of any size, from a small date-night spread to a large grazing table.
What You’ll Need
Salami: This is the star, so choose wisely. You want a salami that’s thin enough to fold easily but sturdy enough to hold its shape. Genoa salami is the most popular choice — it’s widely available, slices thin, and has a beautiful marbled look. Hard salami also works well. Avoid anything too thick or too soft, as it won’t fold cleanly or hold its curve.
How much to buy: Plan on roughly 3–4 oz of salami per person if it’s one of several proteins on the board. For a dedicated salami river as the visual centerpiece, a half-pound gives you plenty to work with for a medium-sized board.
Your board: A longer board or serving surface gives you more room to let the river wind naturally. Rectangular boards, long wooden planks, and large slate boards all work beautifully. That said, even a round board can host a salami river — you’ll just curve it more tightly.
Optional: A pair of clean kitchen tweezers or tongs can help with precise placement, especially if you’re doing a longer, more elaborate river.
How to Make a Salami River: Step by Step
Step 1: Plan your path. Before you place a single slice, take a moment to visualize where your river will flow. It should curve at least once or twice — a completely straight line loses the organic, flowing effect. Lightly trace the path with your finger on the board so you have a guide to follow.
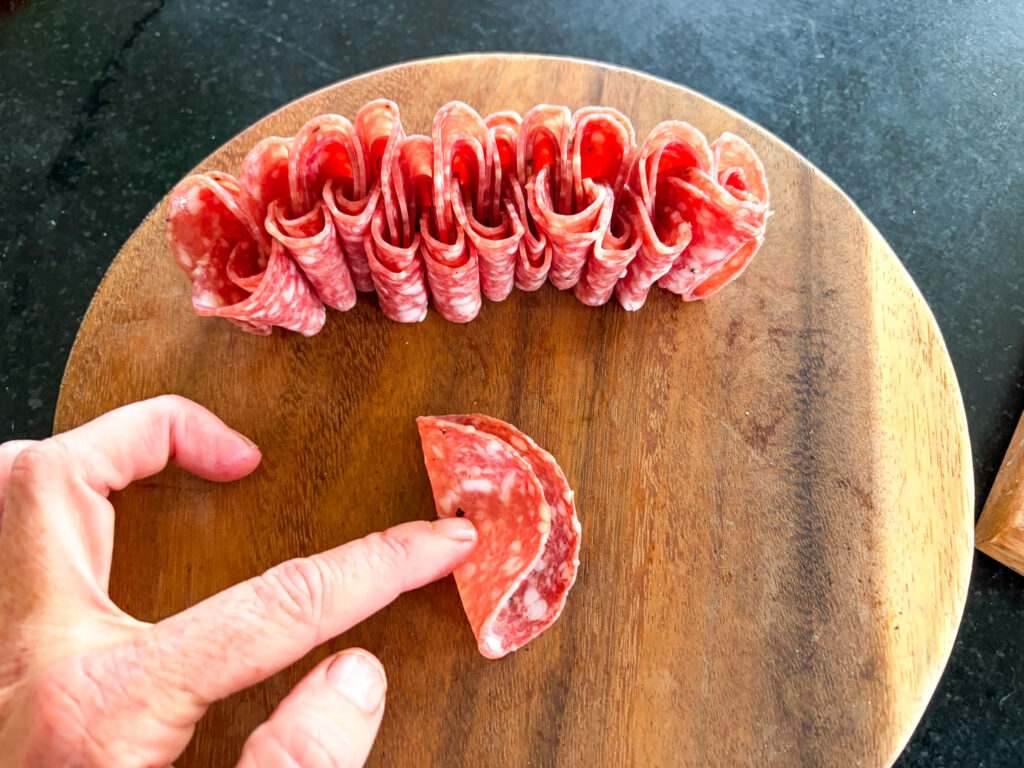
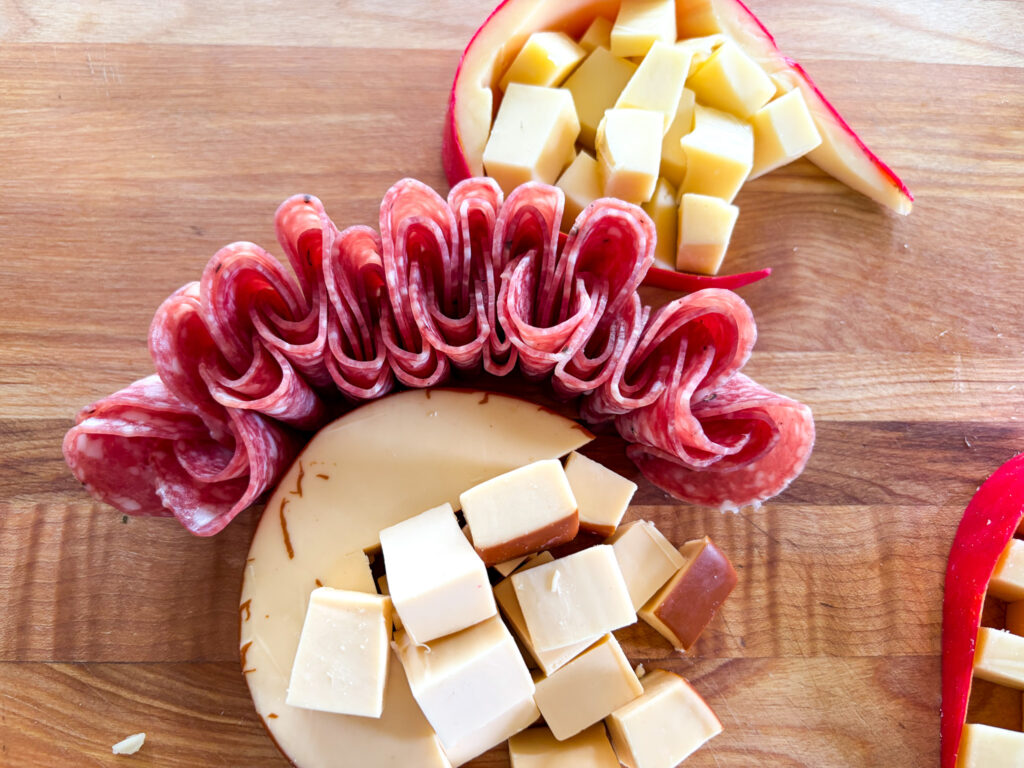
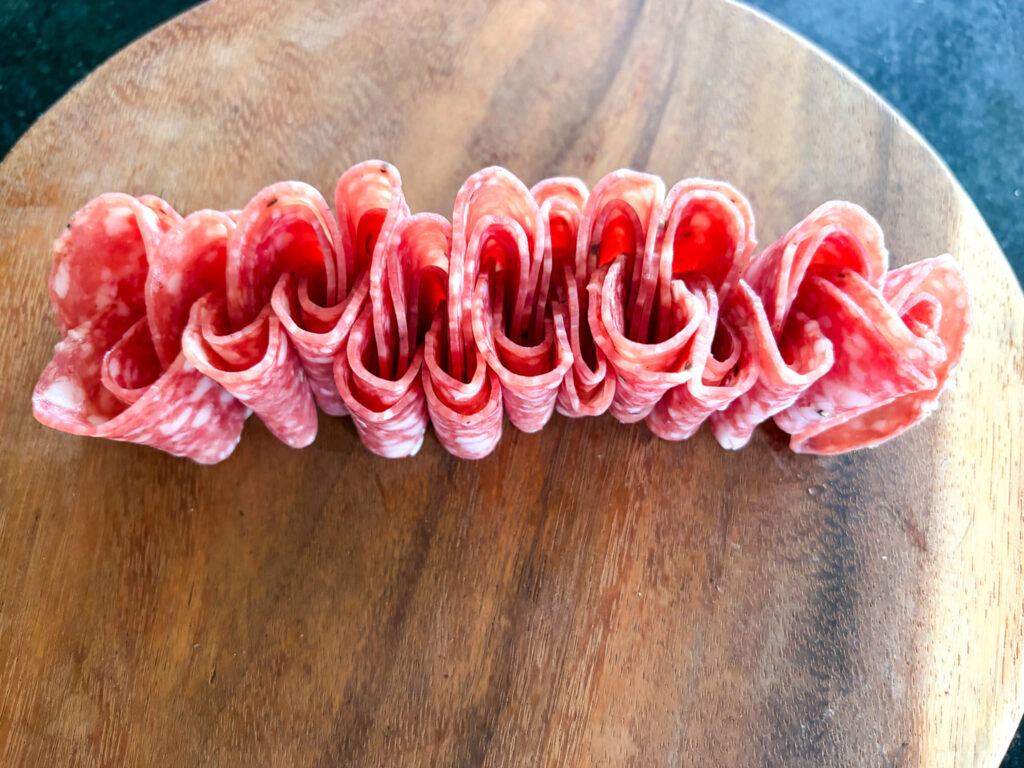
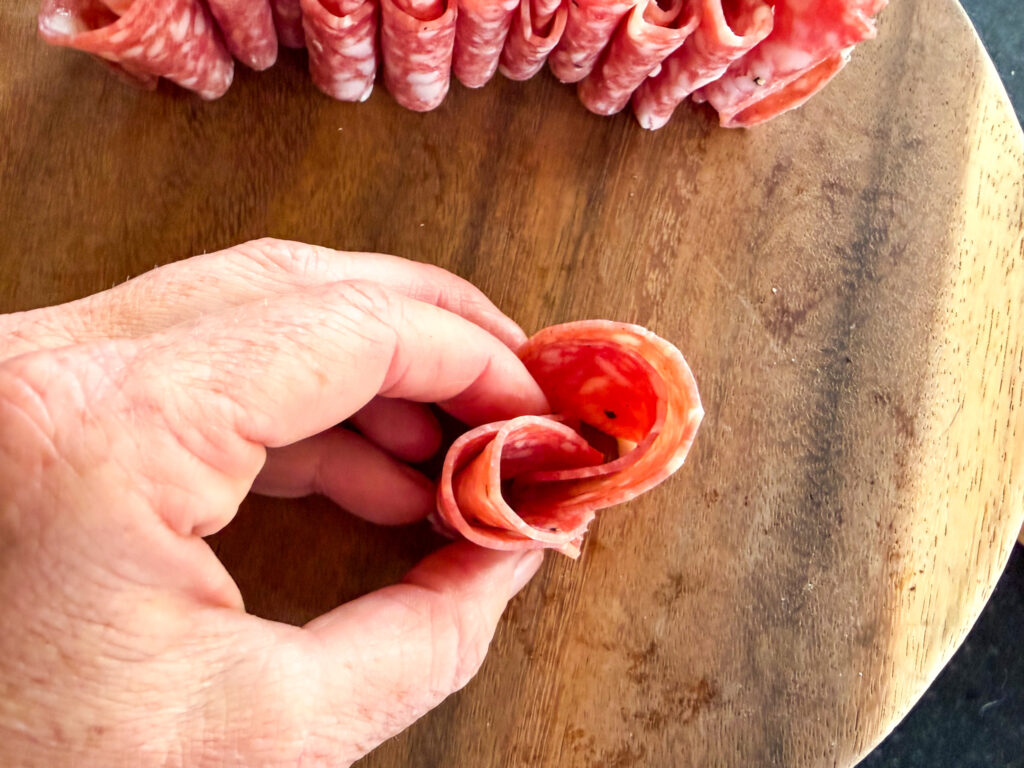
Step 2: Fold your first slice. Take one slice of salami and fold it in half, then fold it in half again so you have a quarter-circle shape with a rounded edge facing outward. This is your standard “river fold.” It creates that layered, ruffled look when pieces are placed together.
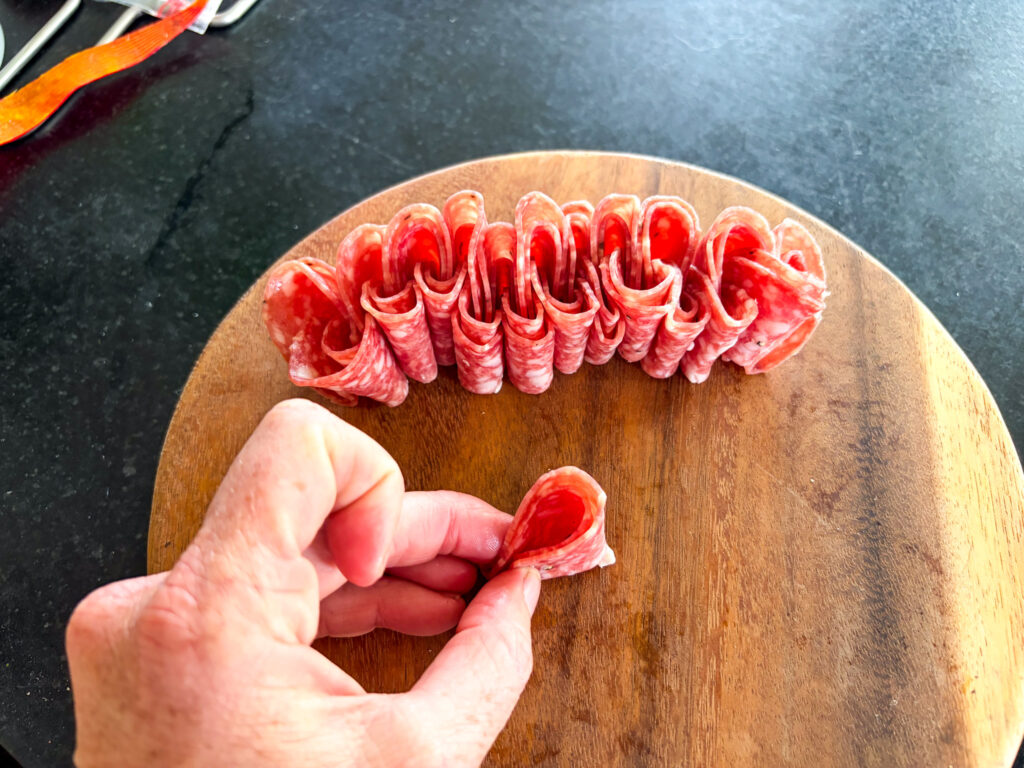
Step 3: Start placing and overlapping. Set your first folded slice at one end of your traced path, rounded edge out. Place the next folded slice slightly overlapping the first, angling it to follow your curve. Continue down the path, overlapping each piece about halfway over the last. The overlap is what creates the full, flowing appearance too little and it looks sparse, too much and it loses definition.
Step 4: Adjust as you go. As you build, gently nudge slices to follow your curve. Don’t worry about perfection — small variations in the fold angle actually make the river look more natural and less rigid. Think of it less like placing tiles and more like arranging fabric.
Step 5: Finish the ends. When you reach the end of your river, tuck the last slice slightly under the previous one so it has a clean finish rather than a blunt stop. You can also fan the final few slices outward slightly for a natural-looking “delta” effect.
Styling Tips to Take It Further
- Fill in around the river with accompaniments that hug the edges — clusters of grapes, small bowls of olives, stacks of crackers, or cubes of cheese. This makes the river feel intentional and integrated into the board rather than just dropped on top.
- Mix in a second meat along part of the river — thinly sliced prosciutto folded the same way adds color contrast and visual texture without breaking the flow.
- Play with scale. A tighter, more compact river with smaller folds reads as elegant and refined. Looser, larger folds feel rustic and generous. Match the style to your occasion.
- Use the river as a divider. A salami river is a natural way to separate sections of your board — cheese on one side, sweet elements on the other — while keeping everything visually connected.