Are you celebrating a graduation this year? Graduation parties are the perfect place for people to drop in and grab a snack – enter the graduation hat charcuterie board. This board is a fun way to celebrate with great food and fun chocolate graduation hats.
I’ve also made a ‘Grad Party Board’ You might want to check out.
Looking for more charcuterie board ideas? You can search here on my ideas page or join my newsletter.
Hi, I’m Gretchen - creator of Amazing Charcuterie Boards. I help home hosts and beginners create beautiful, stress-free charcuterie boards with simple rules, realistic portions, and easy styling techniques.

If you’re planning your next board, you may also find these helpful:
→ Charcuterie Board Portion Calculator
→ How to Design a Charcuterie Board (simple rules & layouts)
→ The Best Charcuterie Board Pairings

Want more board ideas and planning guides? Join my free newsletter here or search ideas.

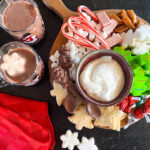
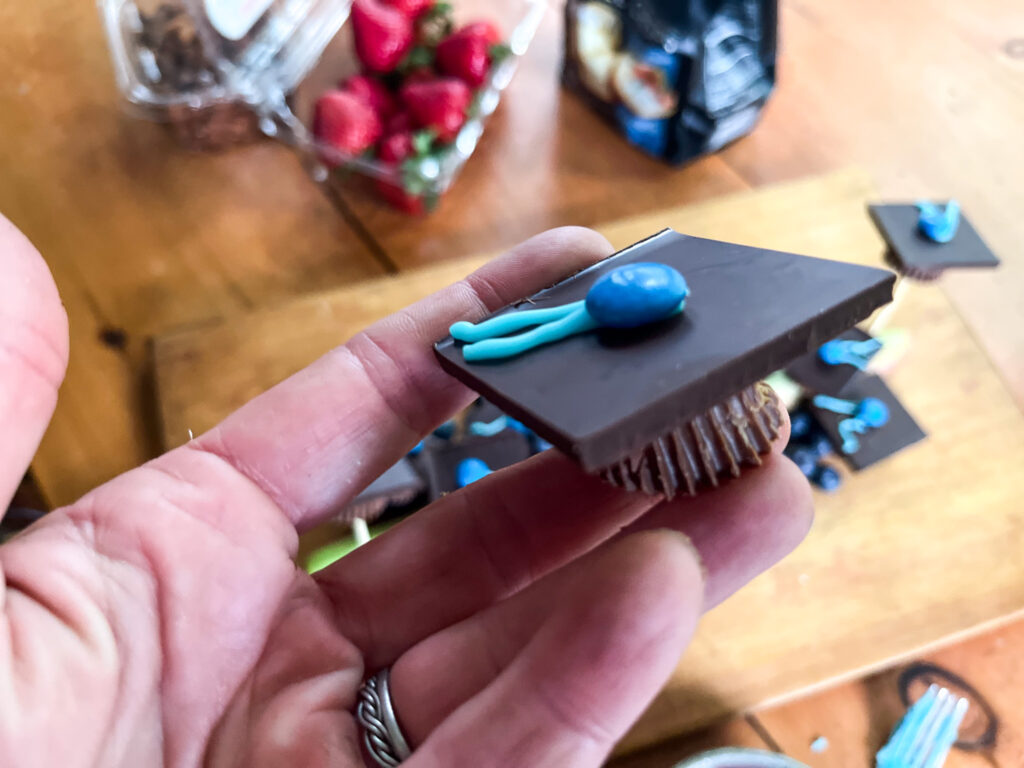
How to Make Chocolate Graduation Hats
Making these hats is so easy and fun. Here’s what you’ll need:
- Small Reese Cups
- Ghirardelli Chocolate Bar – with square piece of chocolate or Square pieces of Chocolate
- M and Ms
- Icing
Start by breaking your chocolate bar into squares. Heat a pan and melt one end of the Reese for just a minute and stick it to the center of the chocolate. Put your icing in a plastic bag or icing bag and add two lines of icing from the center of your chocolate and add a M and M to the center. You can put these hats directly on your board OR you can put a skewer in and put the hats above your board like I did in this board.
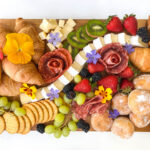
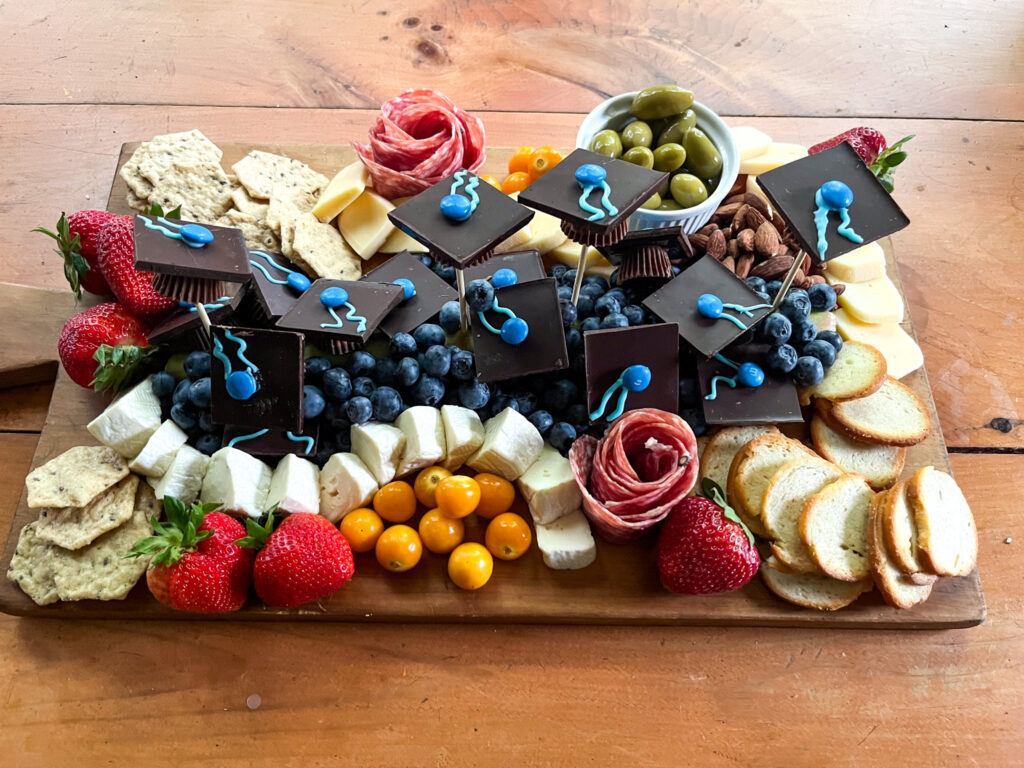
Graduation Hat Charcuterie Board Ingredients
You can add any ingredients to this board, or you can use the ingredients listed below:
- Chocolate graduation hats (see above)
- Salami Strawberries
- Olives
- Melba Crackers
- Brie
- Blueberries
- Crackers
- Gouda Cheese
- Golden Berries
- Almonds
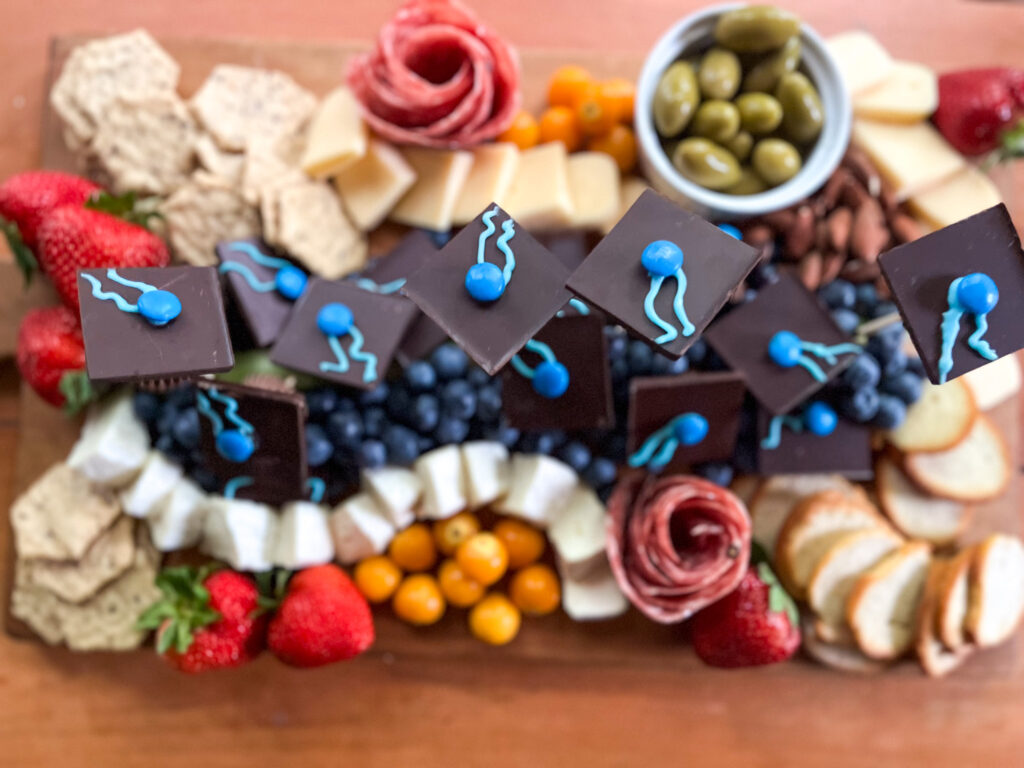
How To Build this Graduation Hat Charcuterie Board
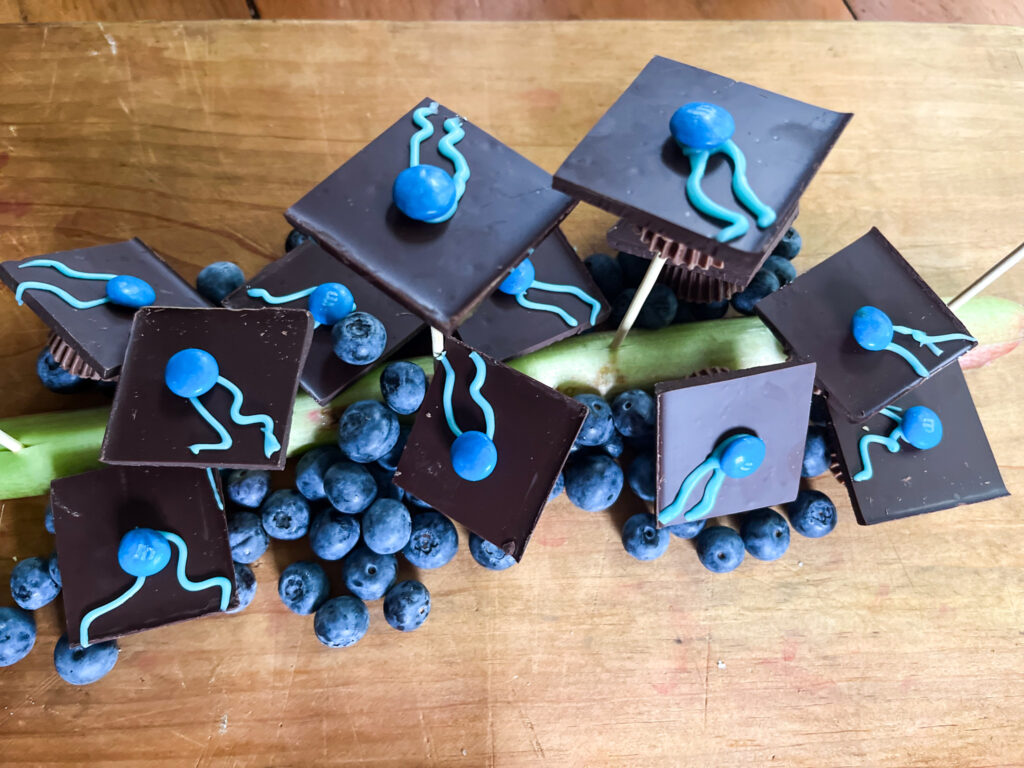
To build this board, start with making your graduation hats. I put about 1/2 of the hats on a skewer.
To put the hats above the board, you will need something to stick the skewers into. I used a stick of rhubarb since I had it on hand, but you could also use melon, cheese, or anything that is solid and will support the weight of the hats. If needed, use icing to attach this to the board.
Put blueberries on top of this to cover it up and add the rest of the graduation hats.
Add the rest of the ingredients to the board making sure to cut the ingredients into bite sized pieces. You can place items on the board in groups or rows. Get creative by adding salami roses and cutting your cheese.
It’s a nice element to coordinate the colors of this board with the school’s color. We made this board for a friend graduating from high school and added a few blue elements to match the school color.
Tips for Serving this Charcuterie Board
1. Keep It Cool (Literally)
If your party is outdoors or during warm weather, make sure to keep the chocolate graduation hats and cheeses from melting. Serve the board inside or place it over a chilled tray or marble slab to help keep it cool.
2. Make It Grab-and-Go Friendly
Since graduation parties often involve guests popping in and out, prep your ingredients in bite-sized portions and offer toothpicks or mini tongs so guests can grab what they want without slowing down the celebration.
3. Add a Sign or Label
A cute chalkboard sign or a small label next to the board with “Class of [Year]” or the graduate’s name adds a personal touch. You could also label the different cheeses and meats if you’re offering a variety.
4. Color Coordinate
Use small details—like blue napkins, ribbons, or berries—to match the graduate’s school colors. Even coordinating the M&Ms on the chocolate hats adds a thoughtful detail.
5. Elevate the Display
Use cake stands, boxes, or wooden crates to add different levels to your display. This can make your chocolate hats on skewers stand out even more, and creates visual interest on your snack table.
6. Make It a Centerpiece
Place the graduation board front and center on your snack table and build around it with drinks, plates, and other small treats. It makes a great conversation starter and photo opportunity!
7. Prepare Ahead
You can make the chocolate hats and prep most of the ingredients a day ahead—just store everything in airtight containers in the fridge. Assemble the board an hour or two before the party to keep everything fresh.
8. Include a Sweet + Savory Mix
The fun graduation hats are sweet, so be sure to balance them with salty elements like cheese, olives, and salami. This gives everyone something they’ll love and keeps the board feeling well-rounded.