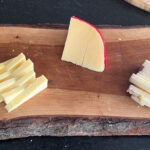
Putting together a charcuterie board can often feel overwhelming, especially if you are new to making boards. One of the best solutions to creating the perfect board is to apply one of the many charcuterie board design principles to make it easy and quick. One of my favorite methods to making the perfect board is to use the flavor wheel method.
This method focused on the specific tastes of the food items and less about the visual design or categories making this a good method if you are all about the flavors.
Looking for more design ideas?
- The 3 3 3 3 Rule for Charcuterie Boards
- What is the Snack Board Formula for Designing a Charcuterie Board?
- What is the 5 S Rule for Charcuterie Board Design?
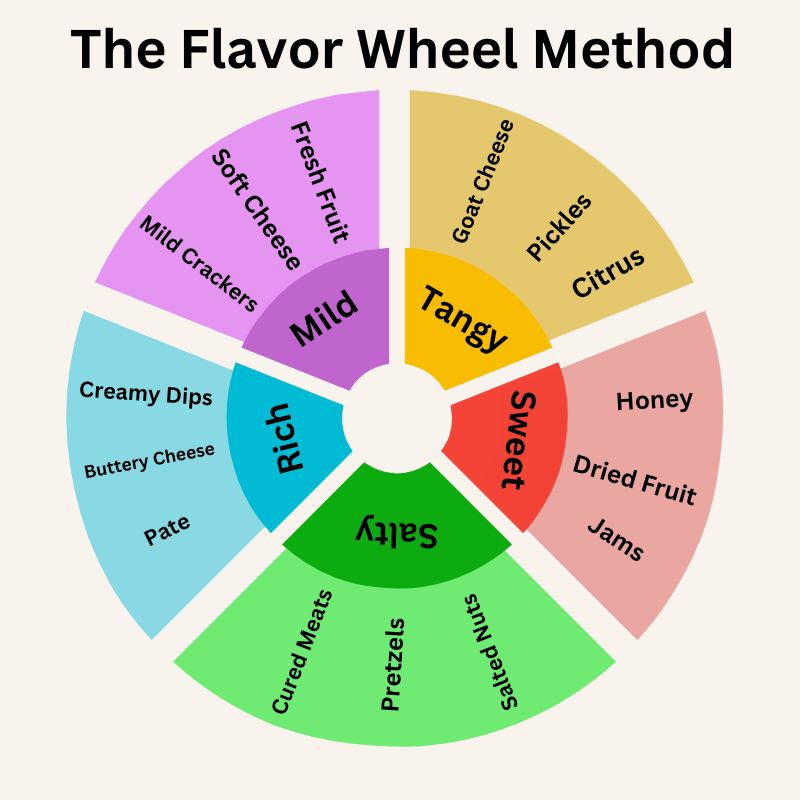
Quick Look at the Flavor Wheel Method
Organize your board by these complementary flavor profiles:
- Mild: Soft cheeses, mild crackers, fresh fruits.
- Rich: Creamy dips, buttery cheeses, pâté.
- Tangy: Pickles, citrus, goat cheese.
- Salty: Cured meats, pretzels, salted nuts.
- Sweet: Jams, dried fruits, honey.
Pairing Flavors for the Perfect Charcuterie Board
Building a charcuterie board isn’t just about selecting delicious ingredients—it’s about crafting a sensory experience where flavors enhance and contrast with each other. By using the flavor wheel, you can create balanced pairings that excite the palate and make every bite unique.
Hi, I’m Gretchen - creator of Amazing Charcuterie Boards. I help home hosts and beginners create beautiful, stress-free charcuterie boards with simple rules, realistic portions, and easy styling techniques.

If you’re planning your next board, you may also find these helpful:
→ Charcuterie Board Portion Calculator
→ How to Design a Charcuterie Board (simple rules & layouts)
→ The Best Charcuterie Board Pairings

Want more board ideas and planning guides? Join my free newsletter here or search ideas.
Complementary Pairings: Flavors That Work in Harmony
Complementary pairings involve combining foods that share similar flavor notes or characteristics, reinforcing and enhancing each other. Examples include:
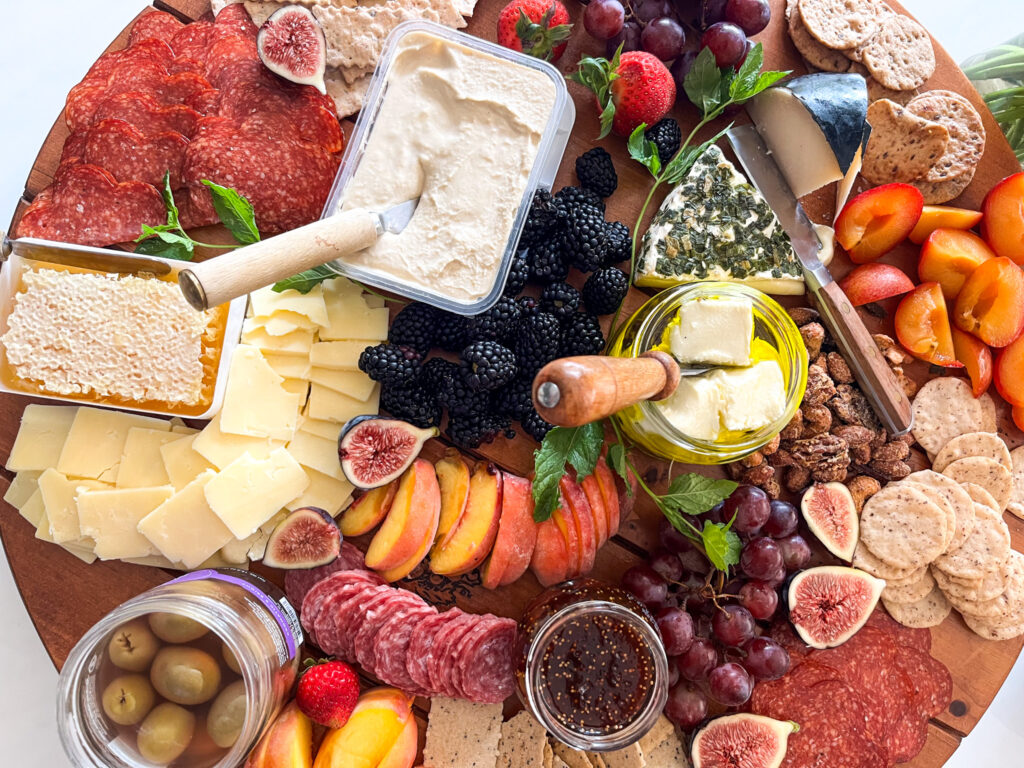
- Salty + Sweet: Prosciutto with melon or honey-drizzled blue cheese. The saltiness of the meat brings out the natural sweetness of the fruit.
- Umami + Savory: Aged gouda with smoked almonds. Both have deep, rich flavors that blend well together.
- Creamy + Mildly Sweet: Brie with fig jam. The soft, buttery cheese is elevated by the sweet and slightly earthy jam.
- Nutty + Fruity: Aged cheddar with apple slices. The sharp, nutty cheddar pairs beautifully with the crisp, natural sweetness of the apple.
Contrasting Pairings: Opposites Attract
Contrasting pairings introduce opposing flavors, creating a more exciting and dynamic tasting experience. These combinations keep the palate engaged and prevent the board from feeling monotonous. Some ideas:
- Rich + Acidic: A fatty, creamy cheese like triple-cream brie paired with tangy pickled onions or grainy mustard. The acidity cuts through the richness, balancing the flavors.
- Spicy + Sweet: A spicy chorizo or hot honey drizzled over goat cheese, where the heat is softened by a touch of sweetness.
- Bitter + Sweet: Dark chocolate alongside candied nuts or dried cherries creates a complex contrast of deep bitterness and caramelized sweetness.
- Salty + Sour: Olives with citrus zest or a salty manchego cheese with a squeeze of lemon for a pop of brightness.
Balancing Textures: The Crunch and Cream Factor
Texture is just as important as taste. A great charcuterie board combines a mix of soft, creamy, crunchy, chewy, and crisp textures for a satisfying experience. Some key textural pairings include:
- Soft + Crunchy: Creamy camembert with toasted baguette slices for contrast.
- Chewy + Crisp: Salami with water crackers—chewy and firm meats balance out with a light, airy crunch.
- Silky + Crunchy: Velvety pâté paired with a crisp crostini or seeded cracker.
How to Layer Flavors for Depth and Variety
To create a balanced and exciting charcuterie board, consider how each bite evolves in the mouth:
- Start with a base – a slice of bread, cracker, or even a piece of fruit.
- Layer on a main component – cheese or cured meat to set the foundation.
- Add a contrast – something tangy (mustard, pickled veggies) or sweet (honey, jam).
- Finish with a crunch – nuts, seeds, or crispy elements like crumbled parmesan crisps.
Building and Arranging the Board with the Flavor Wheel
A well-arranged charcuterie board isn’t just about taste—it should also be visually appealing and easy to enjoy. Using the flavor wheel, you can organize ingredients by flavor profiles while keeping balance and variety in mind.
Step-by-Step Guide to Assembling the Board
- Start with the Base – Place larger items first, like cheese wedges, small bowls for dips, and piles of meats. Spread them out to create structure.
- Add Complementary Flavors – Arrange cheeses near items that pair well with them, such as brie next to fig jam or aged cheddar near apple slices.
- Create Contrast – Position contrasting flavors together to make the board more exciting, like spicy chorizo near honey or pickles next to creamy cheeses.
- Fill in the Gaps – Add crackers, nuts, dried fruits, and fresh herbs to fill empty spaces and add texture.
- Add Final Touches – Garnish with fresh fruit, edible flowers, or rosemary sprigs for a polished look.
Tips for Spacing, Grouping Flavors, and Visual Appeal
- Space Ingredients Evenly: Avoid overcrowding any one section; spread items out so the board looks full but not cluttered.
- Group by Flavor Profiles: Keep salty, sweet, and tangy elements near each other for easy pairing. For example, place blue cheese near honey and nuts to balance its strong flavor.
- Vary Shapes and Sizes: Fold meats, slice cheeses differently, and use small bowls for dips to create an eye-catching layout.
- Use Color Contrast: Bright fruits, dark chocolates, and colorful spreads make the board more visually appealing.
Looking for more ideas? Search here or follow us on Pinterest. Wondering how much it will cost? Try our Cost Calculator.